

Configure CCP in Control Hub
Last modified by Aaron Blackburn on 2026/09/25 20:18
Configure Cloud Connected PSTN In Control Hub
FirstDigital.com · 800-240-4008
To configure Cloud Connected PSTN in Control Hub, you'll need to select "Cloud Connected PSTN" as the PSTN connection type, choose a CCP (Cloud Connected PSTN) provider, and add your phone numbers provided by the CCP.
1
Access Control Hub and Navigate to Locations
Sign in to Control Hub and Go to Management > Locations.
2
Select the Location and Choose PSTN Connection
Follow these steps to select your connection type:
- Click on the specific location you want to configure for Cloud Connected PSTN.
- Go to the Calling sub-menu and click Set up calling (or Manage).
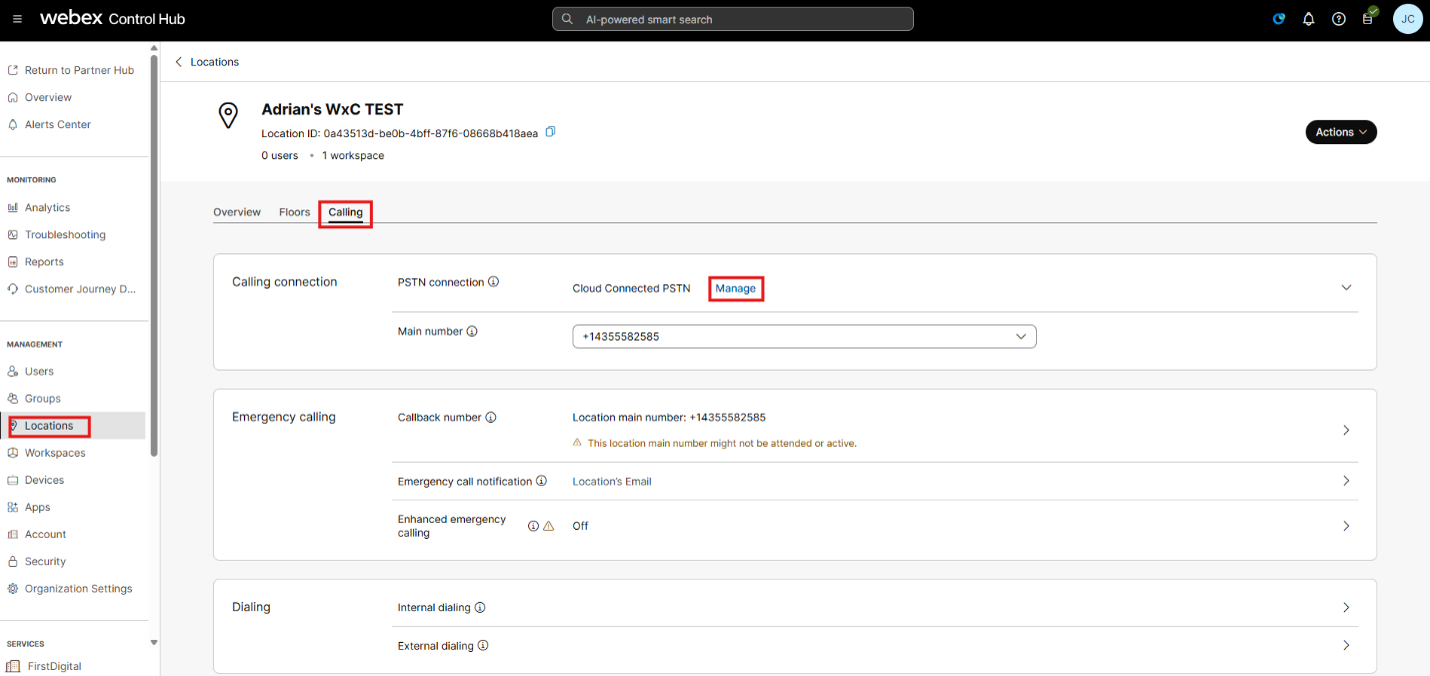
Figure 1.1: Location Calling menu and PSTN connection management.
- Choose "Cloud Connected PSTN" as the Connection Type.
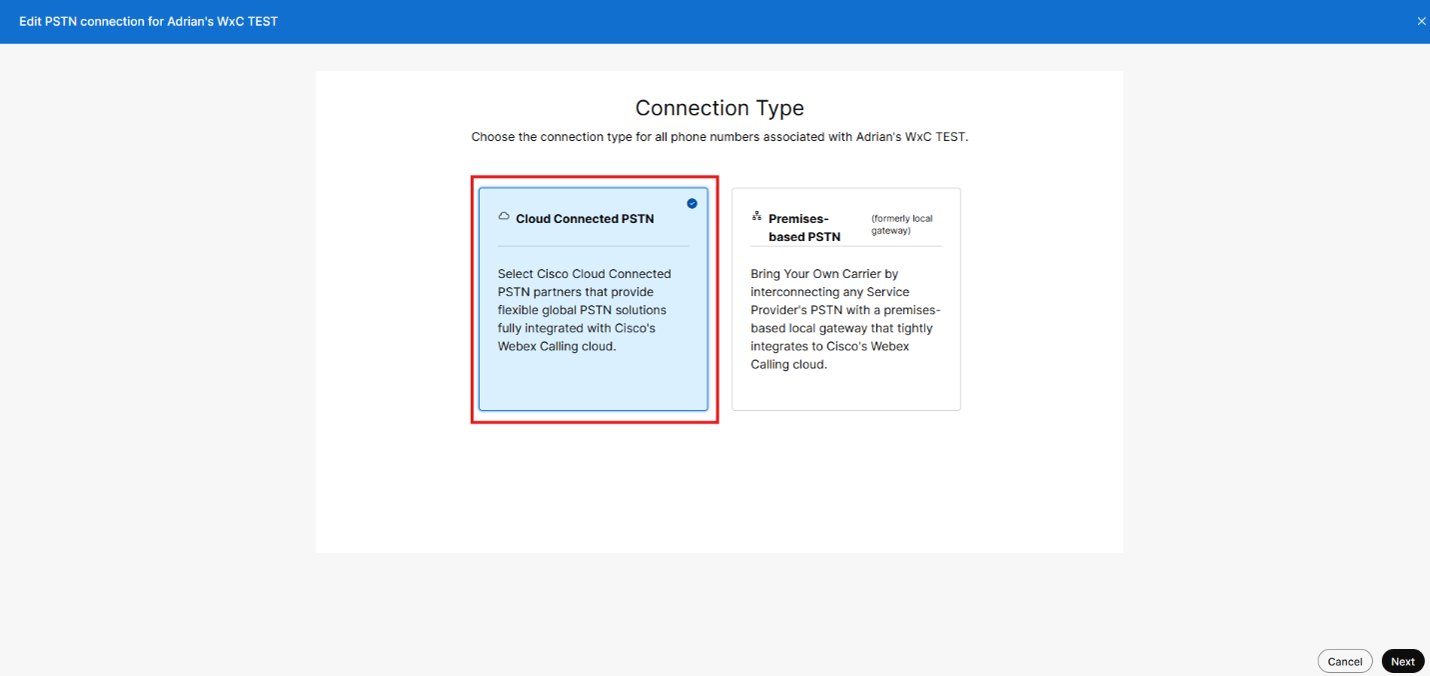
Figure 1.2: Selecting Cloud Connected PSTN as the connection type.
3
Select a CCP Provider
Choose your PSTN provider:
- Select a Cloud Connected PSTN provider from the list (depending on your region).
- Click Next.
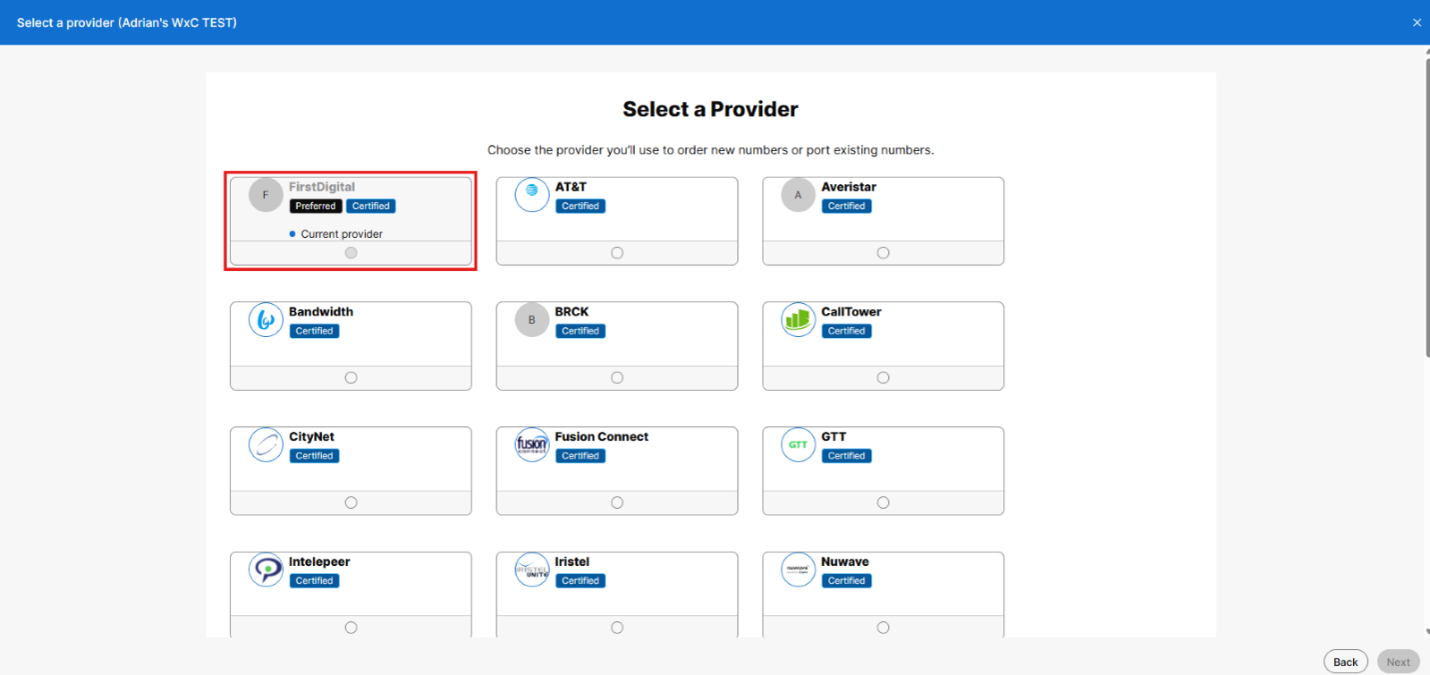
Figure 1.3: Selecting your CCP Provider.
4
Add Numbers
Assign your phone numbers:
- Click "Add Numbers Now".
- Enter the phone numbers you've obtained from your CCP provider, separated by commas if multiple.
- Click Save.
- Click Close on the Summary page.
5
Verify Numbers
Verify that your DIDs were assigned correctly:
- Go to
Calling>Numbersto verify your added DIDs. - You should see the DIDs you added listed here.