
Bulk Provisioning
FDConnect Bulk Management and Provisioning
Complete guide to bulk user provisioning, DID feature management, and self-help options in FDConnect.
Bulk User Provisioning
Access Provision Users Section
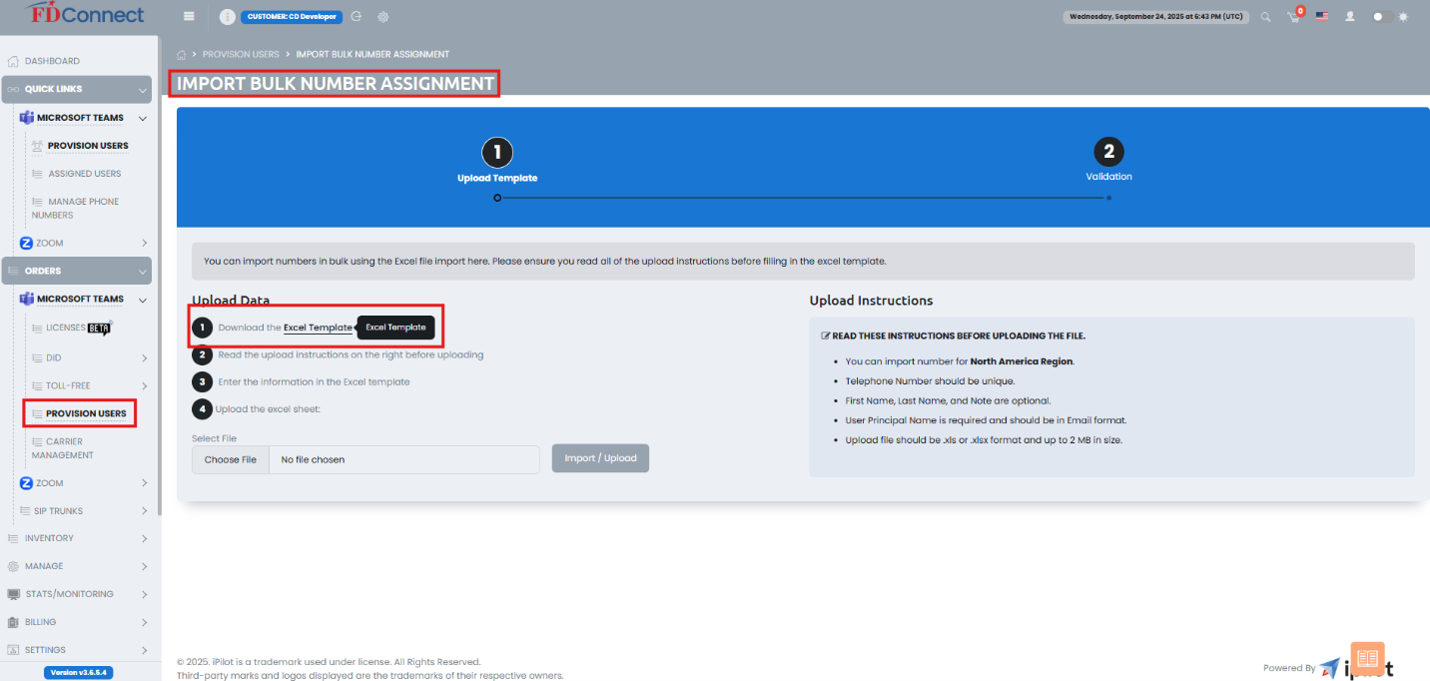
Log into FDConnect and navigate to Orders > Provision Users.
Download & Fill Excel Template
Export and fill out the provided Excel template. Make sure to complete the following columns:
- Country
- First Name
- Last Name
- User Principal Name
- Number
- Note
Upload & Validate
Read all listed upload instructions, upload your saved Excel sheet, and proceed through the wizard steps to complete validation.
Bulk Number Management
Navigate to Bulk Features
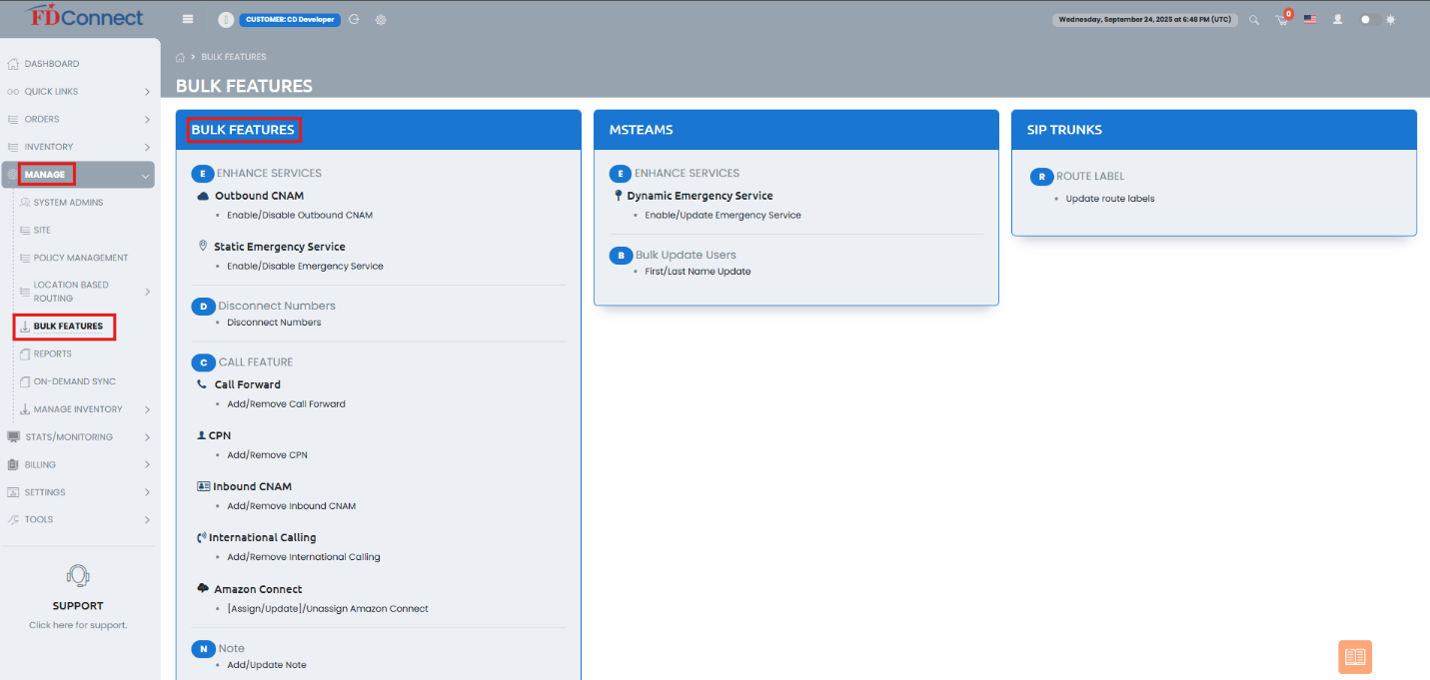
Log into FDConnect and navigate to Manage > Bulk Features.
Select Service & Download/Upload Template
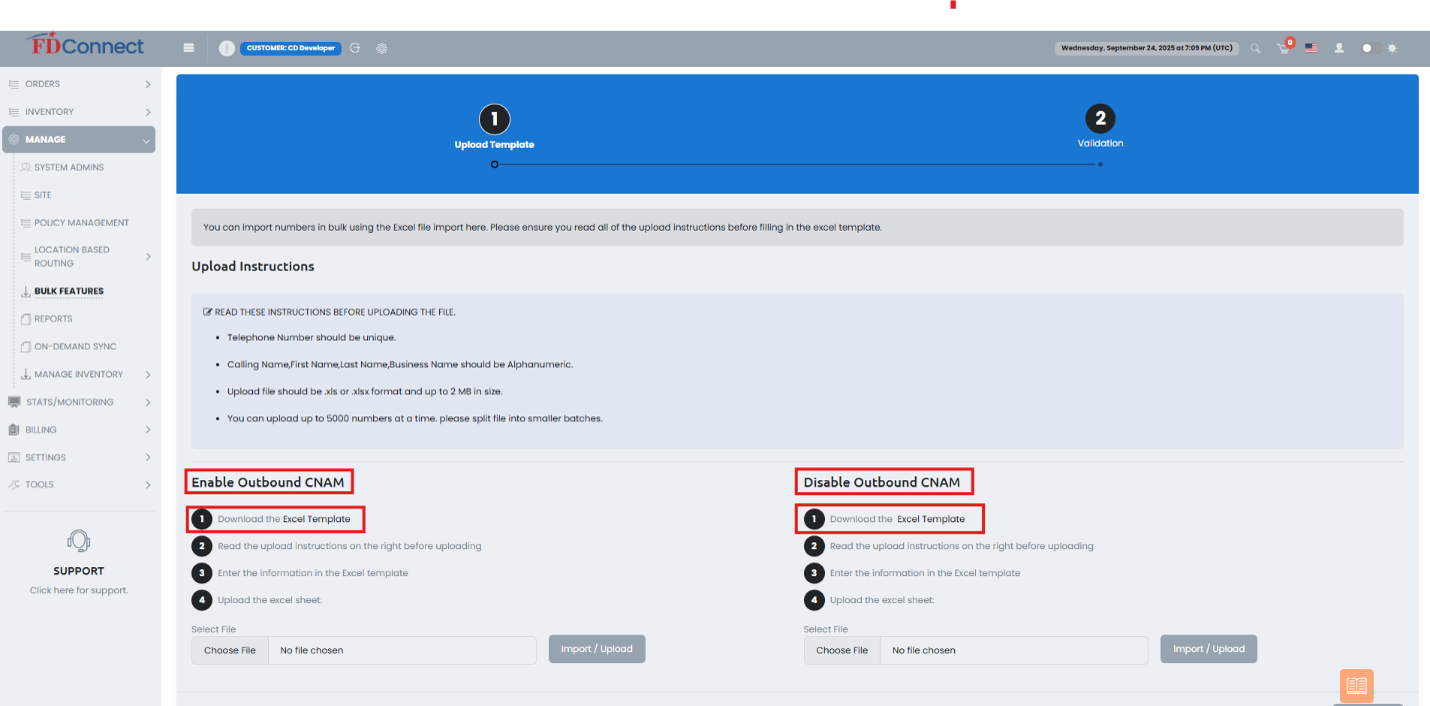
Click on the Enable icon under the specific service you wish to update (e.g., Outbound CNAM, Static Emergency Service, Call Forward, CPN, Inbound CNAM, Dynamic Emergency Services).
Download the corresponding Excel template, fill in your changes, and upload the completed sheet on the following page.
Self-Help & Knowledge Base
Using the "Gold Bible" Knowledge Base Icon
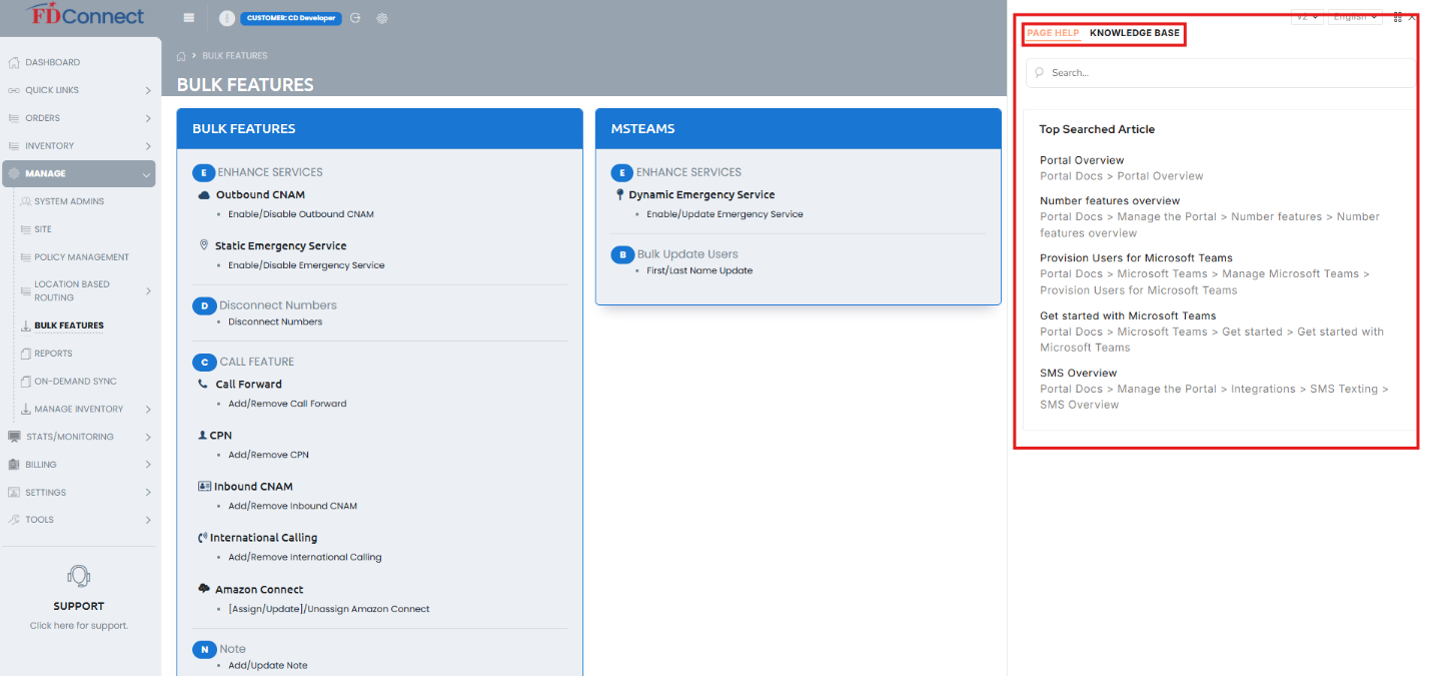
For additional guidance on any page inside FDConnect, click the book icon (referred to as the "Gold Bible") located at the bottom right corner of the page.
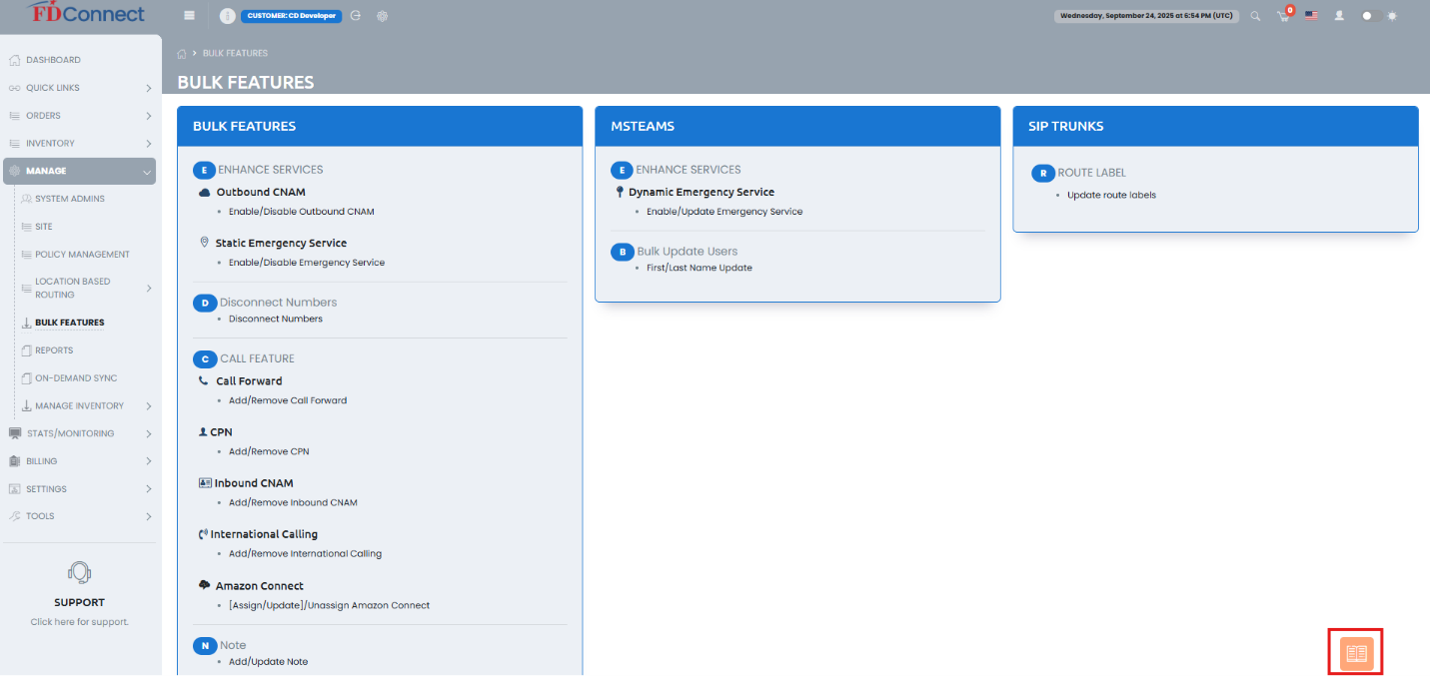
Clicking this icon opens an overlay panel containing page-specific help articles, portal documentation, and a searchable Knowledge Base.